Adding Font Icons
In this blog post, we will show you how to add font icons, and use them on your SpreadSimple website.
But first, what is an icon font and why use it?
To put simply, icon fonts are the fonts made of images and symbols, instead of letters and numbers. These icons are vector images, which makes them easily scalable and good-looking on any screen resolution. And they can be styled with CSS just like any other font.
To add the icons to our website, we are going to:
- Create an icon font and publish it.
- Add our font code to the website.
- Place the icons using short lines of code.
Step 1. Creating the font
For this quick tutorial, we are going to use Fontastic, an icon font library service where we can create our own icon set and host it on Fontastic's icon cloud for free.
After signing up, we can start building our first font by selecting the icons from the available icon sets.
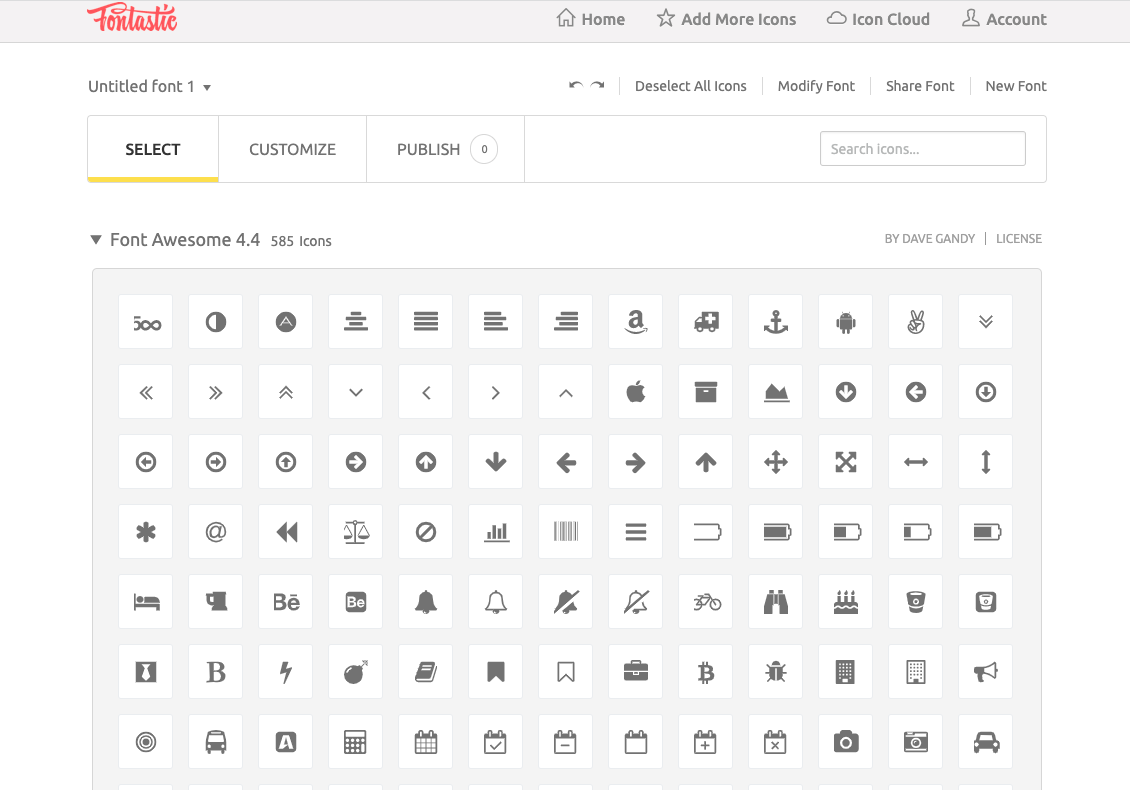
For example, let's show the stock quantity on our website with the battery or progress icons. We can use search to find the icons we want in all the sets available and select them to add to our font.
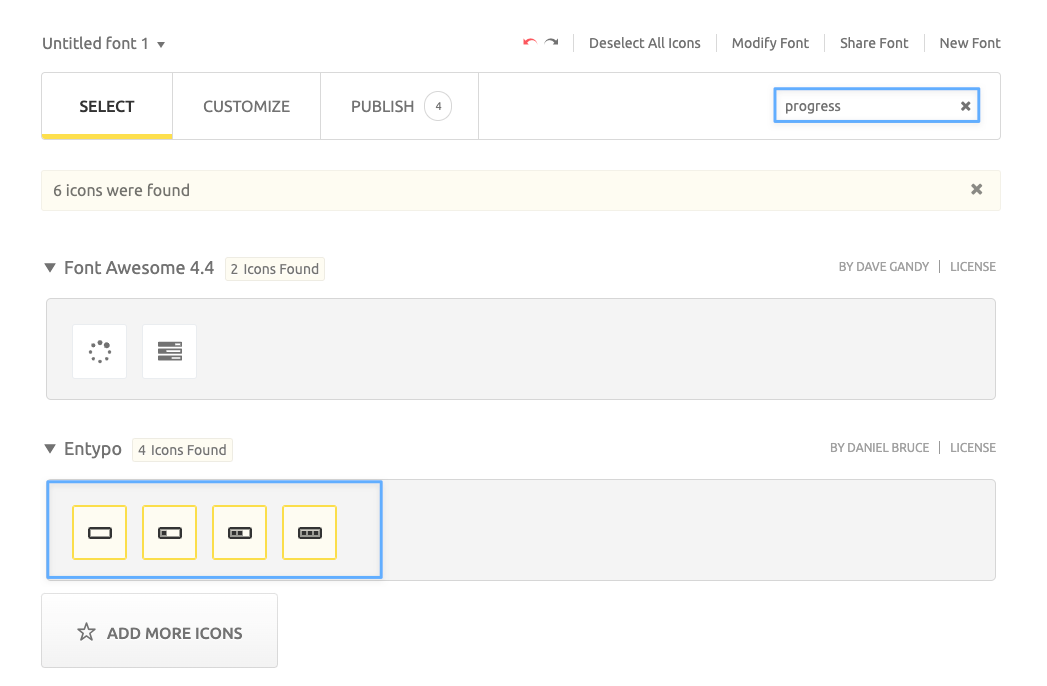
After all the icons are added, we can customize their handles in the Customize tab.
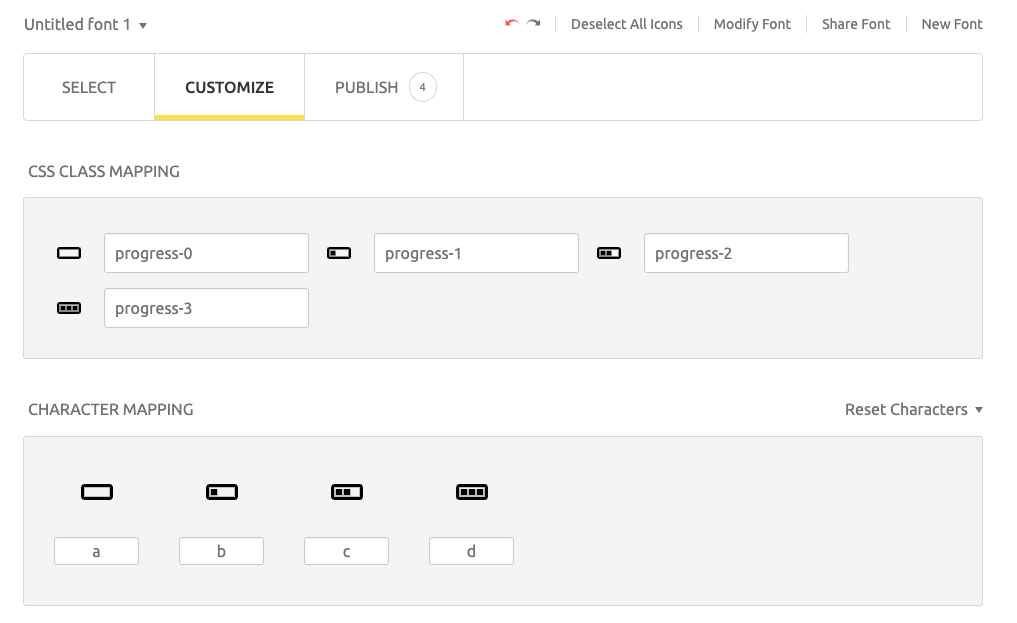
This is completely optional so let’s skip this step and leave the handles as is and publish our font.
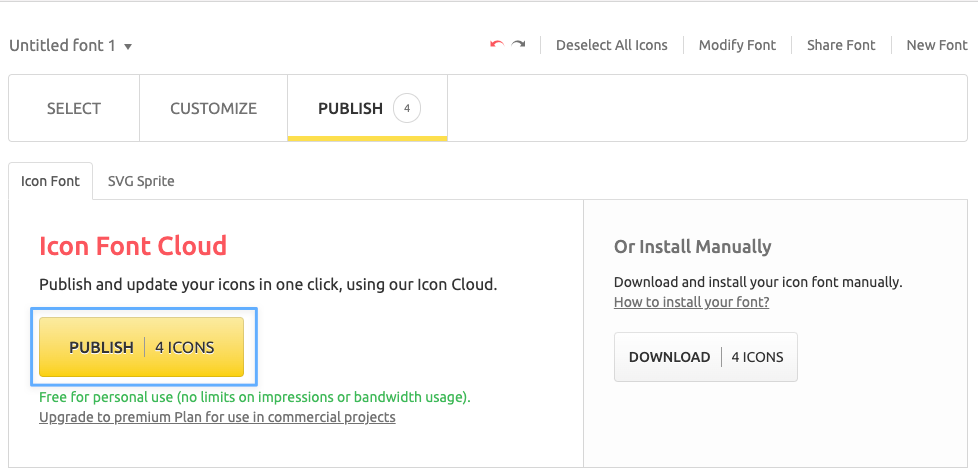
Once the font is published, we need to copy its code.
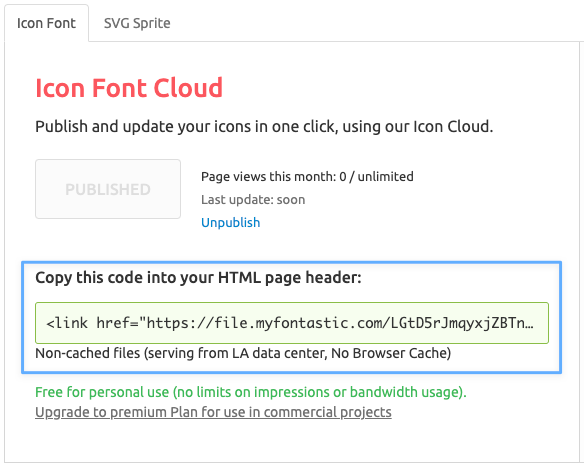
And we are ready for the next step!
Step 2. Adding the code
Now we go to our SpreadSimple dashboard and open our SpreadSimple website in the editor. Then we go to the Settings Tab -> Inject custom code, and paste the code we copied on Fontastic to the <head> section.
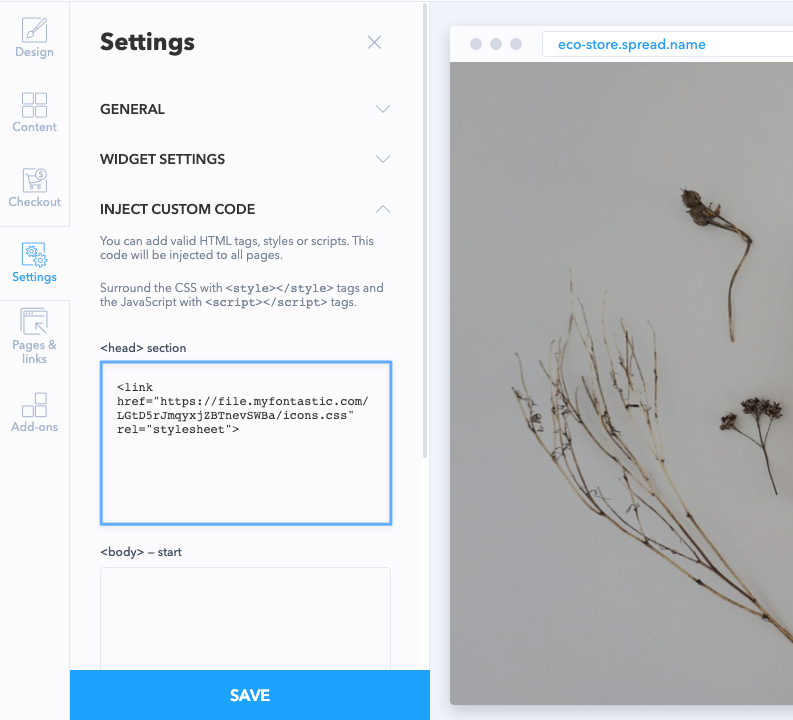
Then we save the changes and we can move to the final – and the most interesting part.
Step 3. Adding icons
As soon as the code is injected and saved, we can start adding our icons. We can place them to the Specifications or Text elements, or to the areas on the website that support HTML (Home page content, Footer, Content pages).
Since we want to display the available stock, we are going to create a new column in our source Sheet and name it Stock.
Then, back on Fontastic, we copy the class of the icon we want to use…
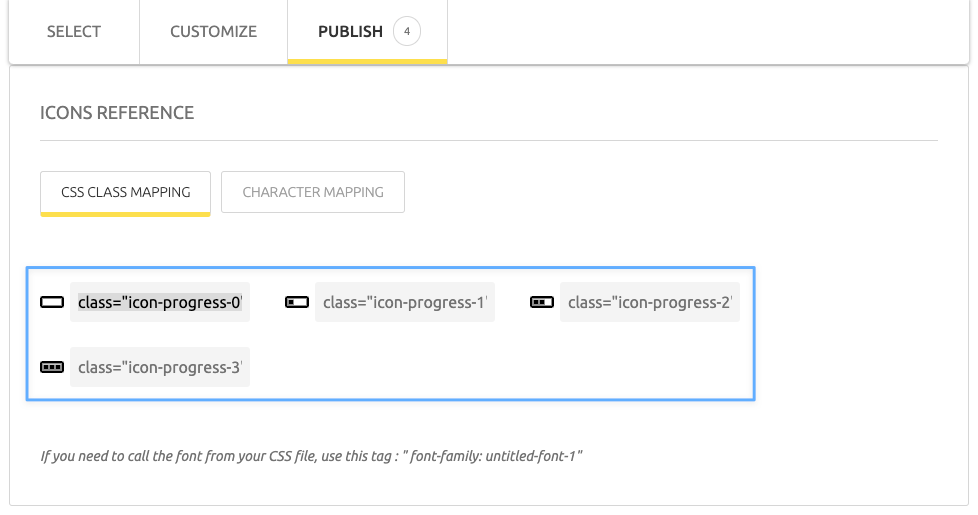
… and paste it to the necessary cell. Then we need to put this line of code in the <i> </i> tags. We can do it this way:
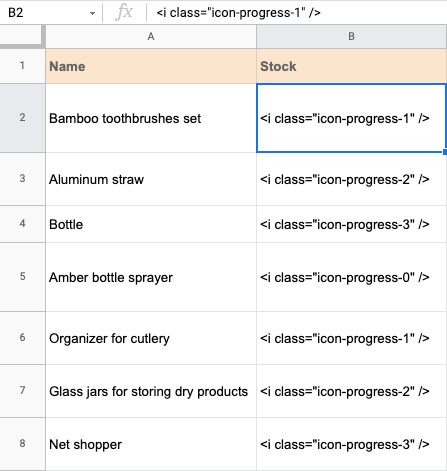
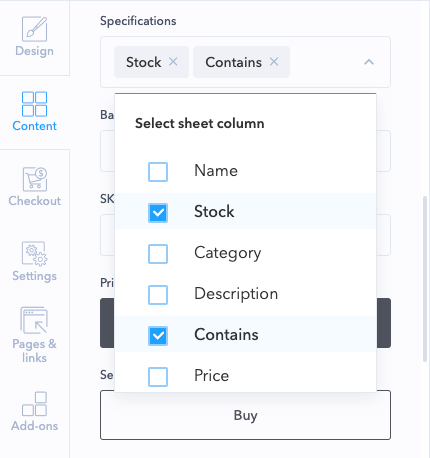
Then we go back to the website editor where we refresh the Sheet and map our Stock column to Specifications (all of that is done in the Content tab).
And finally, we can see our stock icons on site:
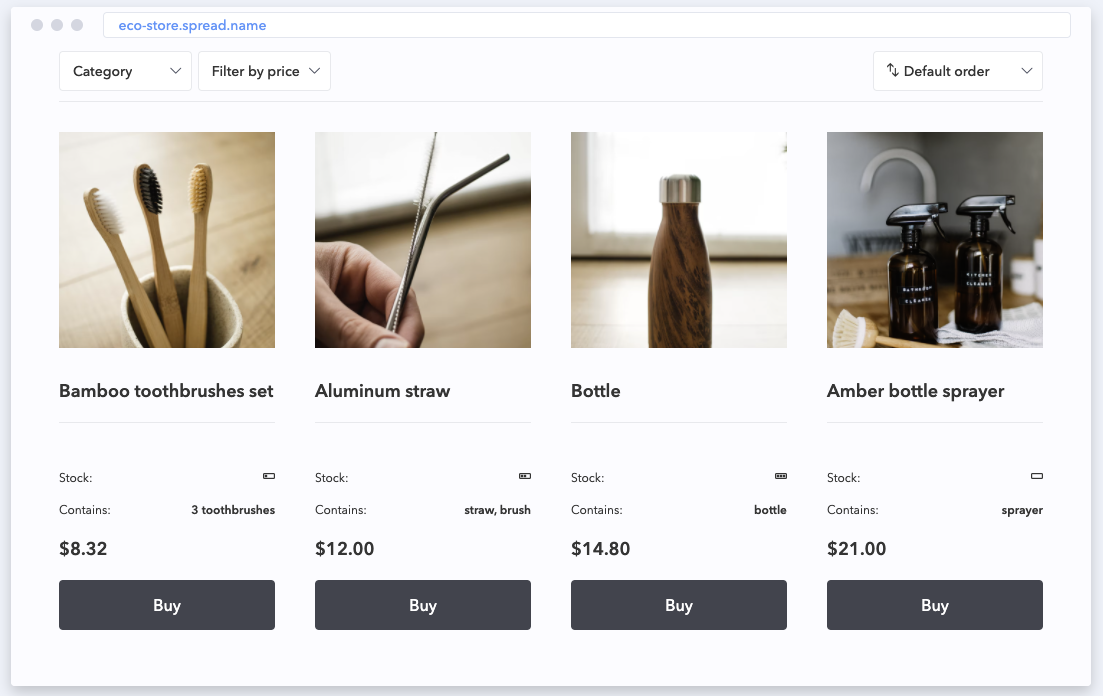
We can also add the icons to the Text, by copying the icon class and adding it in the <i /> tag into the cells of our source Sheet.
And if you decide to use another service, the steps will be pretty much the same.
For example, let’s take Font Awesome icons set.
We sign up to Font Awesome website, create a new kit, and get the script that we need to inject into our website.

We add the kit’s code to our website settings (Settings -> Inject custom code -> <head> section), save the changes and after that, we can find the necessary icons, copy their codes...
![]()
...and paste them to our website text areas that support HTML (Home page content, Footer, Content pages).
Or directly to the Google Sheet if we want to use them in the description like this:

What else can we use the icons for?
To show social media channels and contacts
![]()
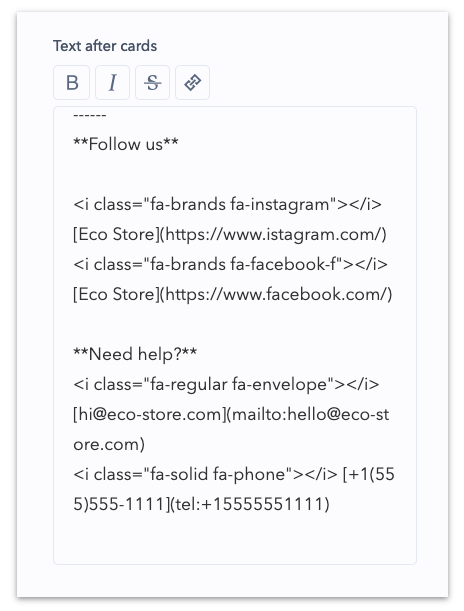
Find the necessary icons and paste their codes to the Text after cards or Footer text area, and add the links to your social media channels.
You can also add a phone number and an email address using the tel: and mailto: links to let your customers contact you with a click.
To display ratings
![]()
Find the star icons (for example, a star and a half star or a star half-stroked) and then add the icons' codes to the Google Sheet column that is mapped to the Text element.
![]()
And to make your workflow more efficient, you can use dropdowns to quickly select the necessary star icons combinations from the list. We are going to cover more on setting and using dropdowns in our next blog post, so stay tuned! ;)
Other font building toolkits and icon libraries
There are plenty of different icon sets nowadays with Font Awesome being the most popular one. Lots of them are available on Fontastic, the library we used in the first part of this post. ![]()
And if you want to explore other toolkits, here are a few other similar services and icon libraries for you to check out.
- Fork Awesome: an open-source service, the fork of Font Awesome, originally created by Dave Gandy, now maintained by a community. Though the icon library is smaller in comparison to other services, Fork Awesome has its benefits, it's easy to use and doesn't require signing up.
- IcoMoon: a popular icon solution, providing three main services: vector icon packs, the IcoMoon App, and hosting icons as SVGs or fonts.
